

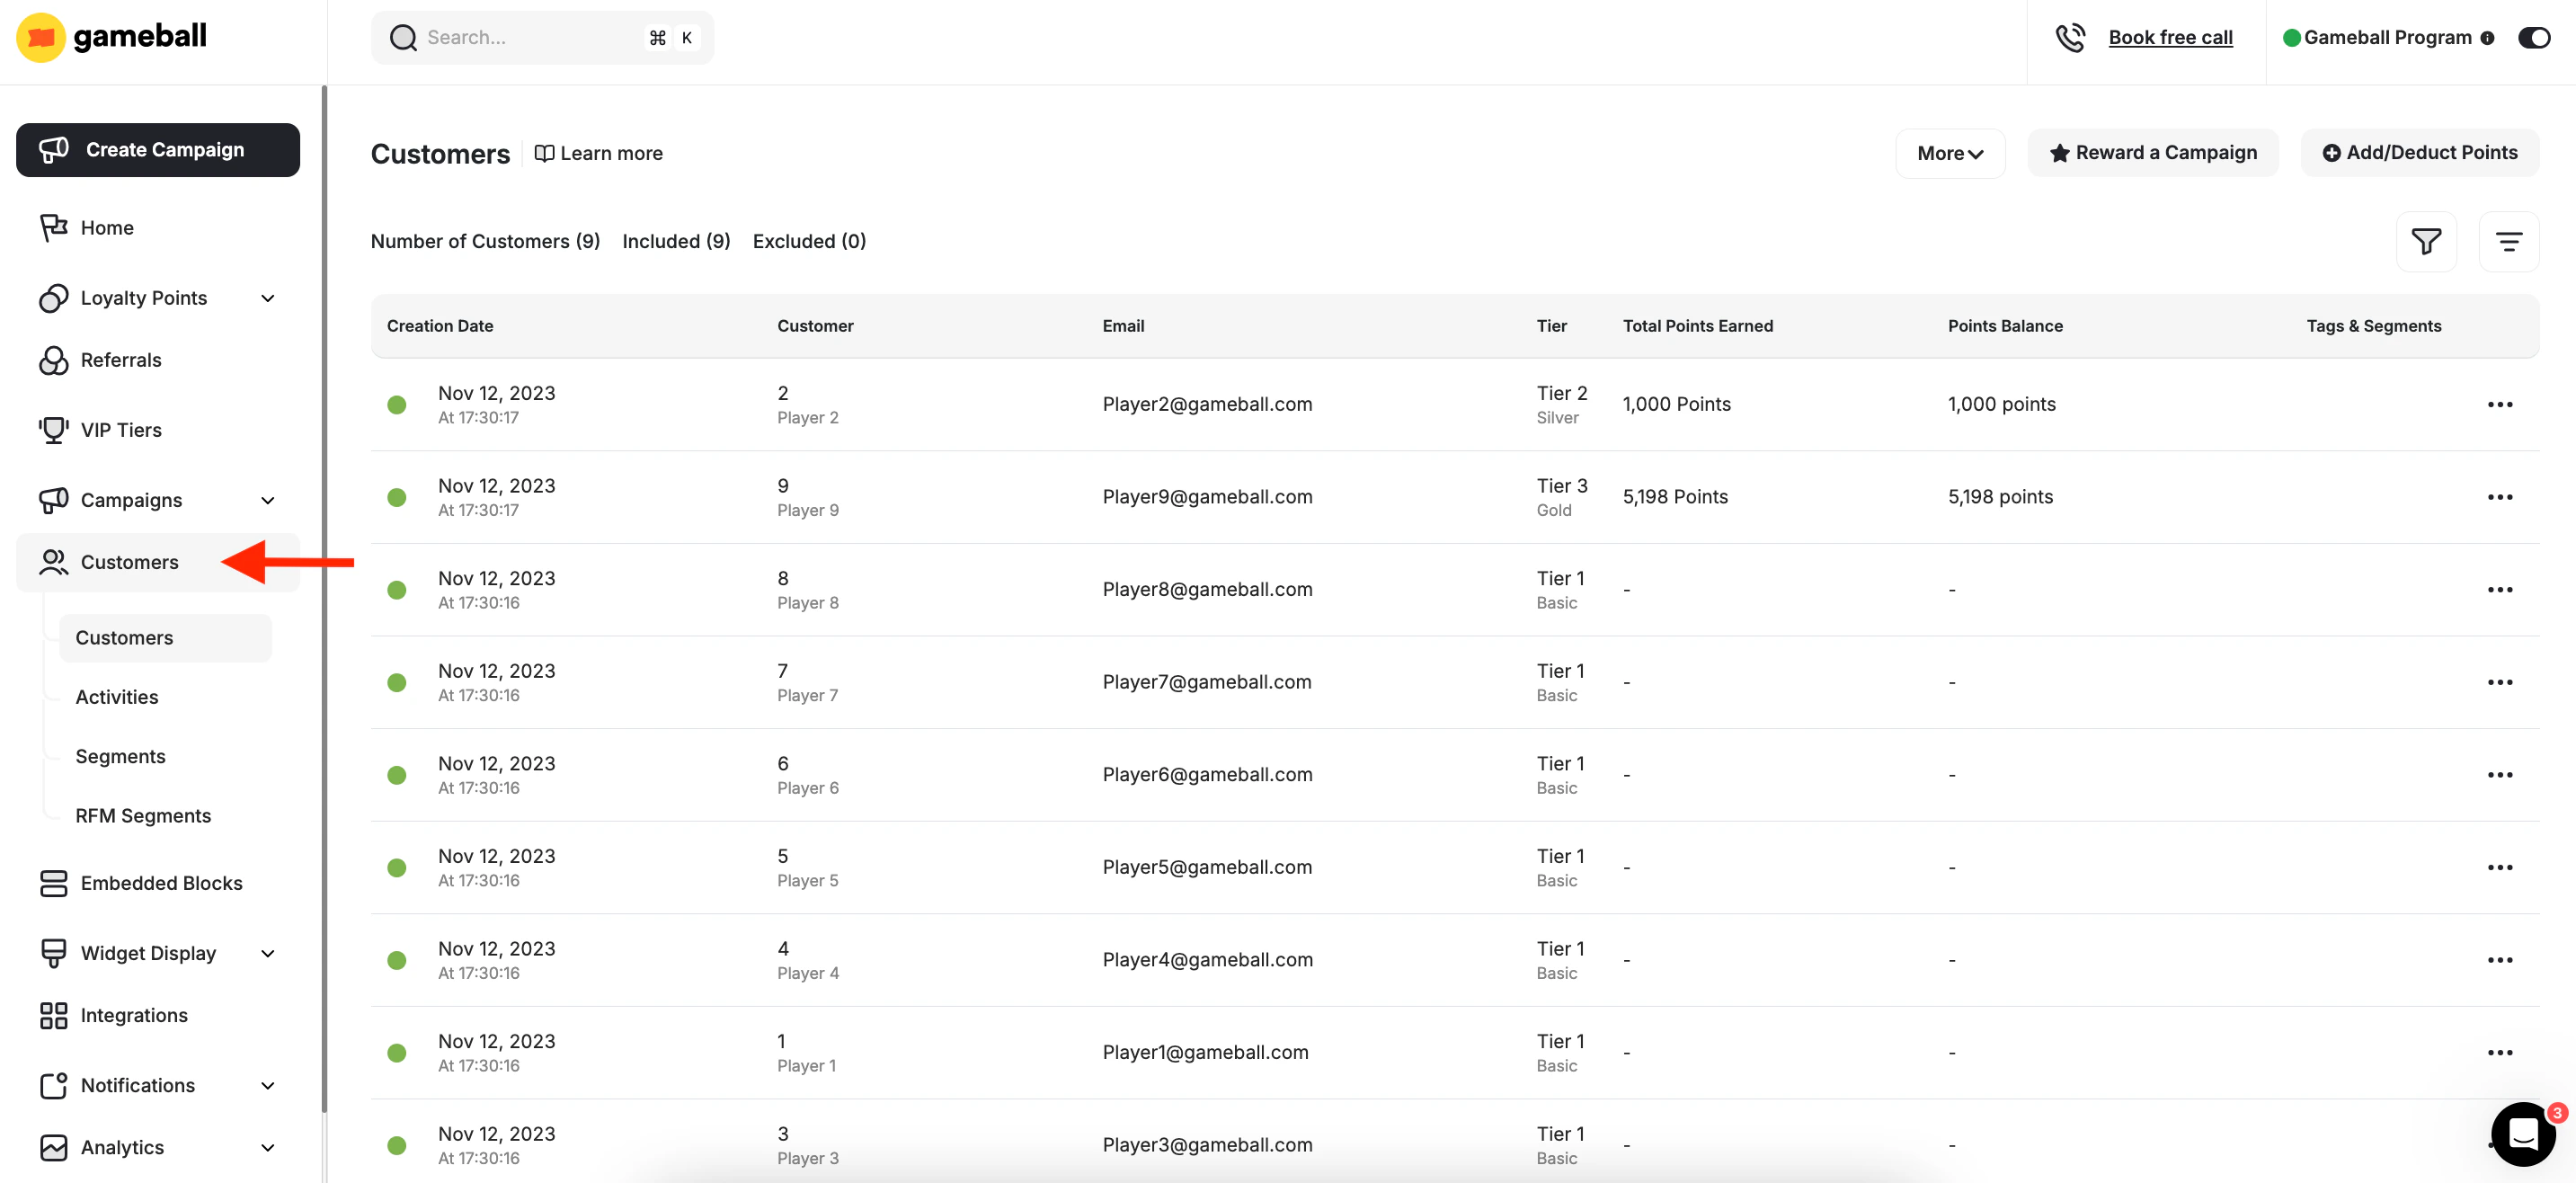
Customer List Overview
Once you access the Customers tab on your Gameball dashboard, you will see a list of all customers along with key profile attributes that help you better understand and manage each customer’s engagement level.Understand the Columns in the Customer List
You can show, hide, and reorder these columns, and add others, as described in Save Views and Choose Your Columns.
Actions Available on Each Row
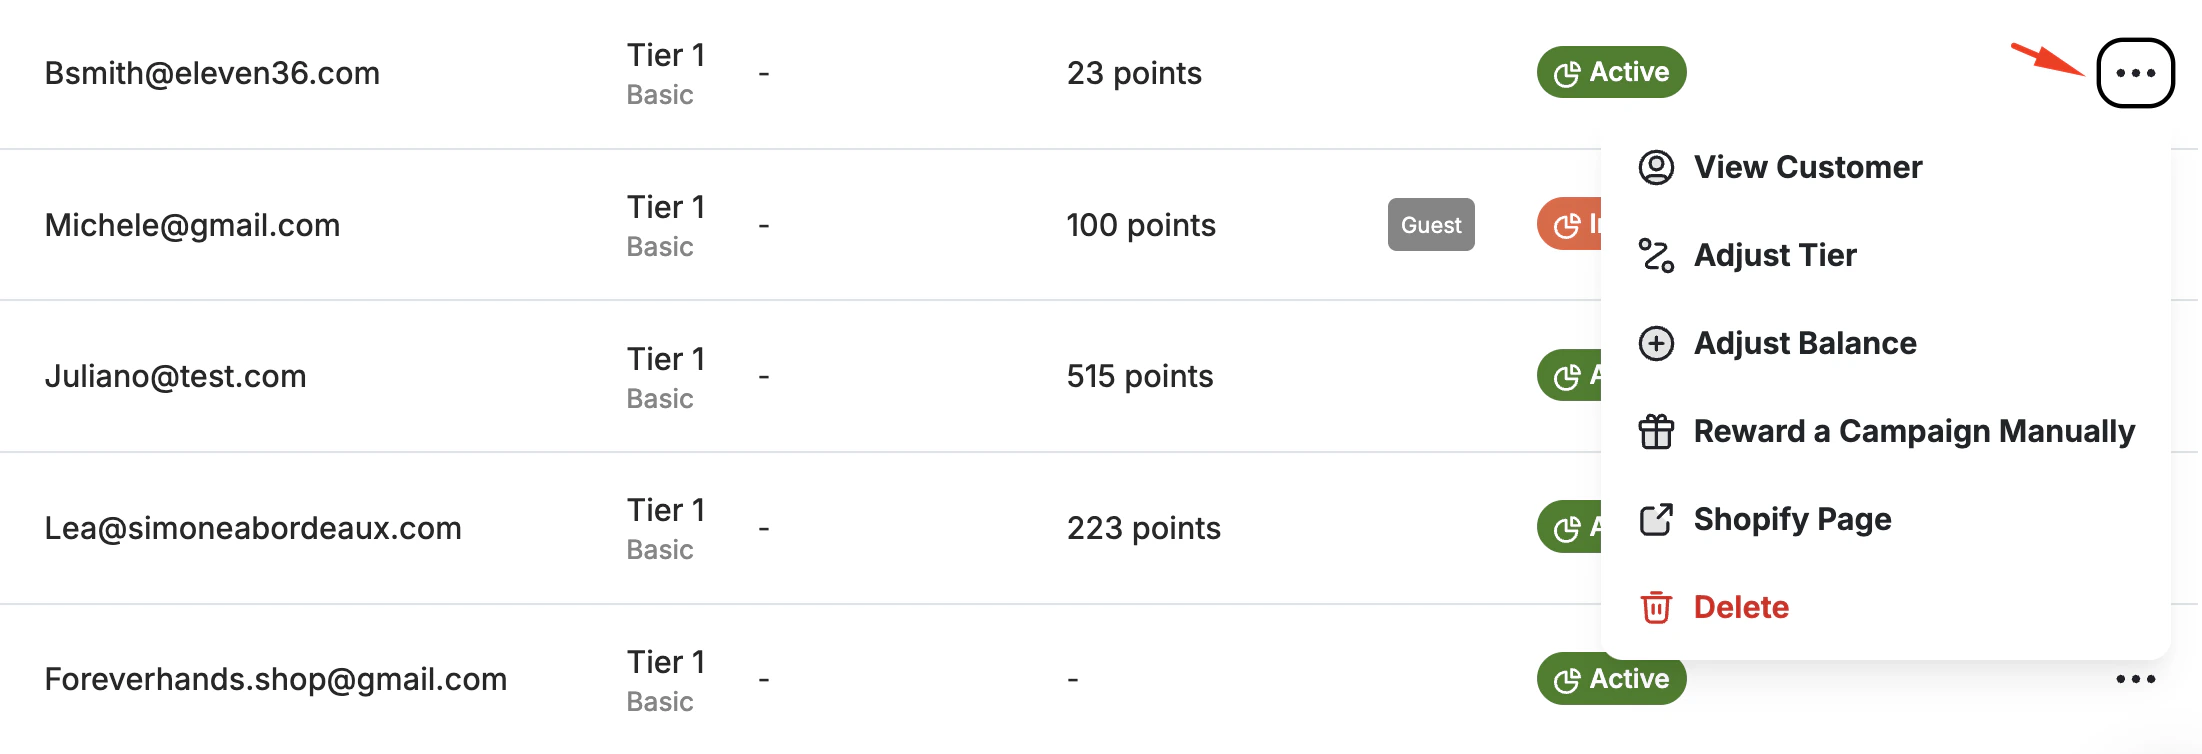
Customers Page-Level Actions
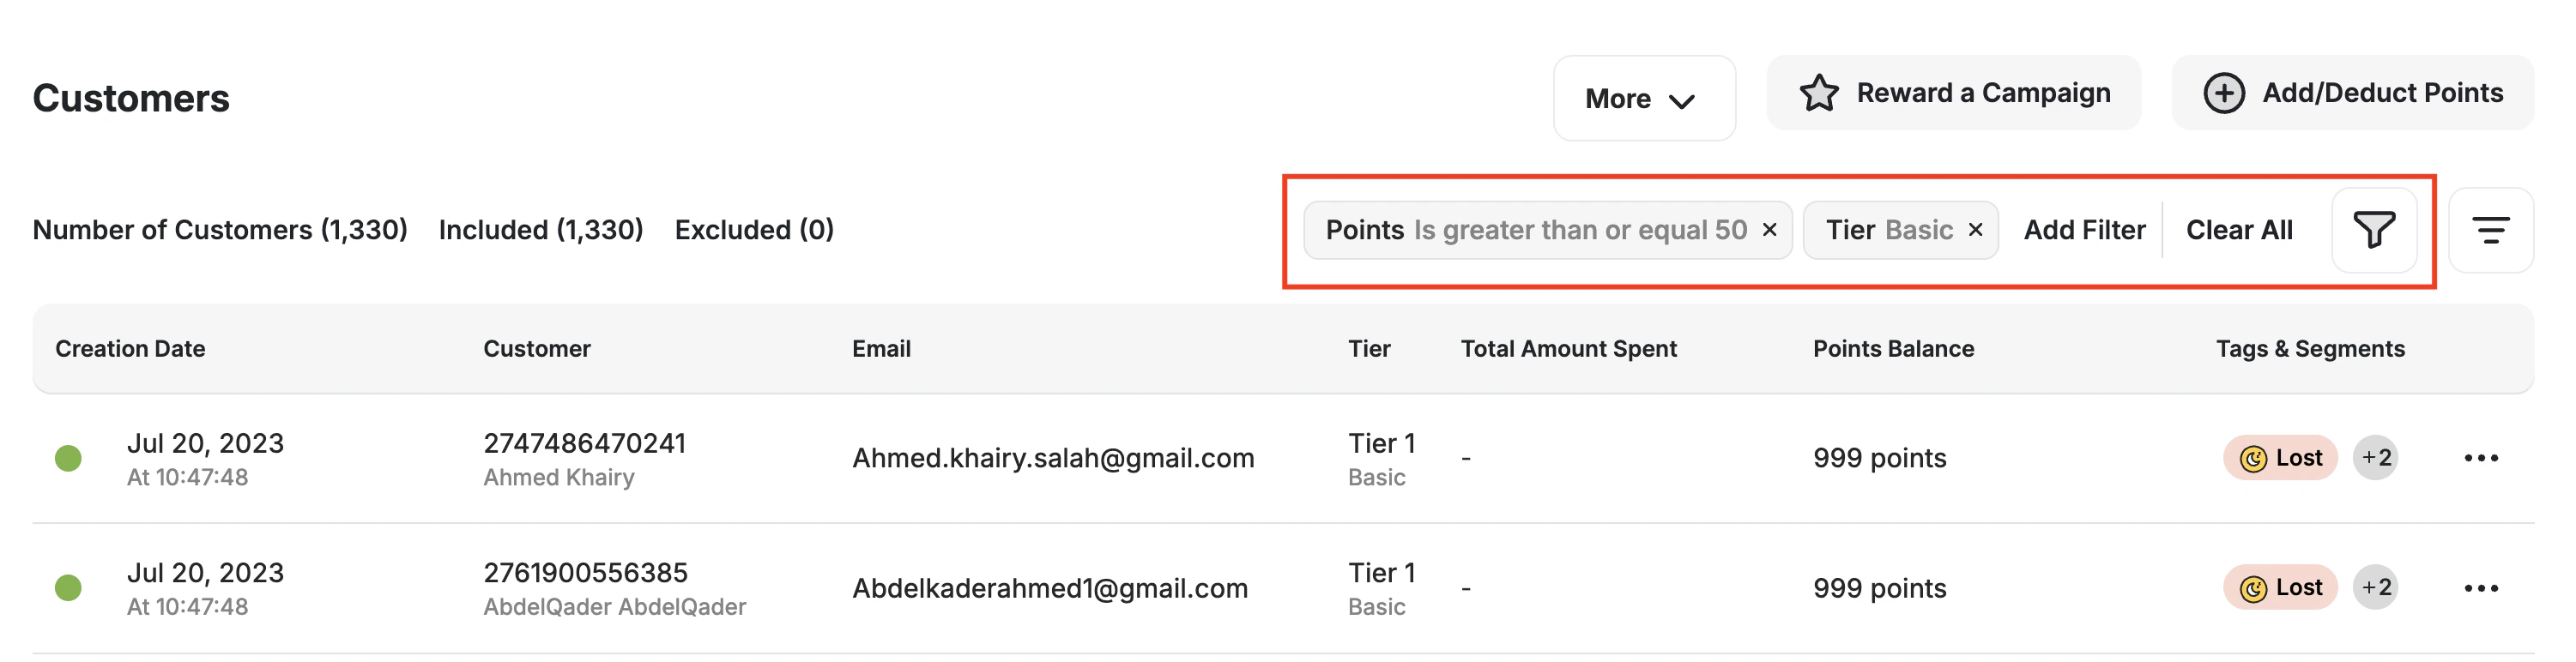
This section covers how to filter your customer list and how to apply single actions and bulk actions to one or more selected customers.Apply Filters to Refine the View
1
Open the filter panel
Click the Filter icon at the top of the Customers page.
2
Select filter options
Select from the available filter options listed below.
3
Define your criteria
Define your criteria (e.g., ranges, keywords, status).
4
Apply the filter
Click Apply Filter to view only the customers matching your selected criteria.
Available Filters
All applied filters will remain active until you manually reset or remove them. The customer list and any bulk actions will reflect only the filtered results.
Perform Bulk Actions
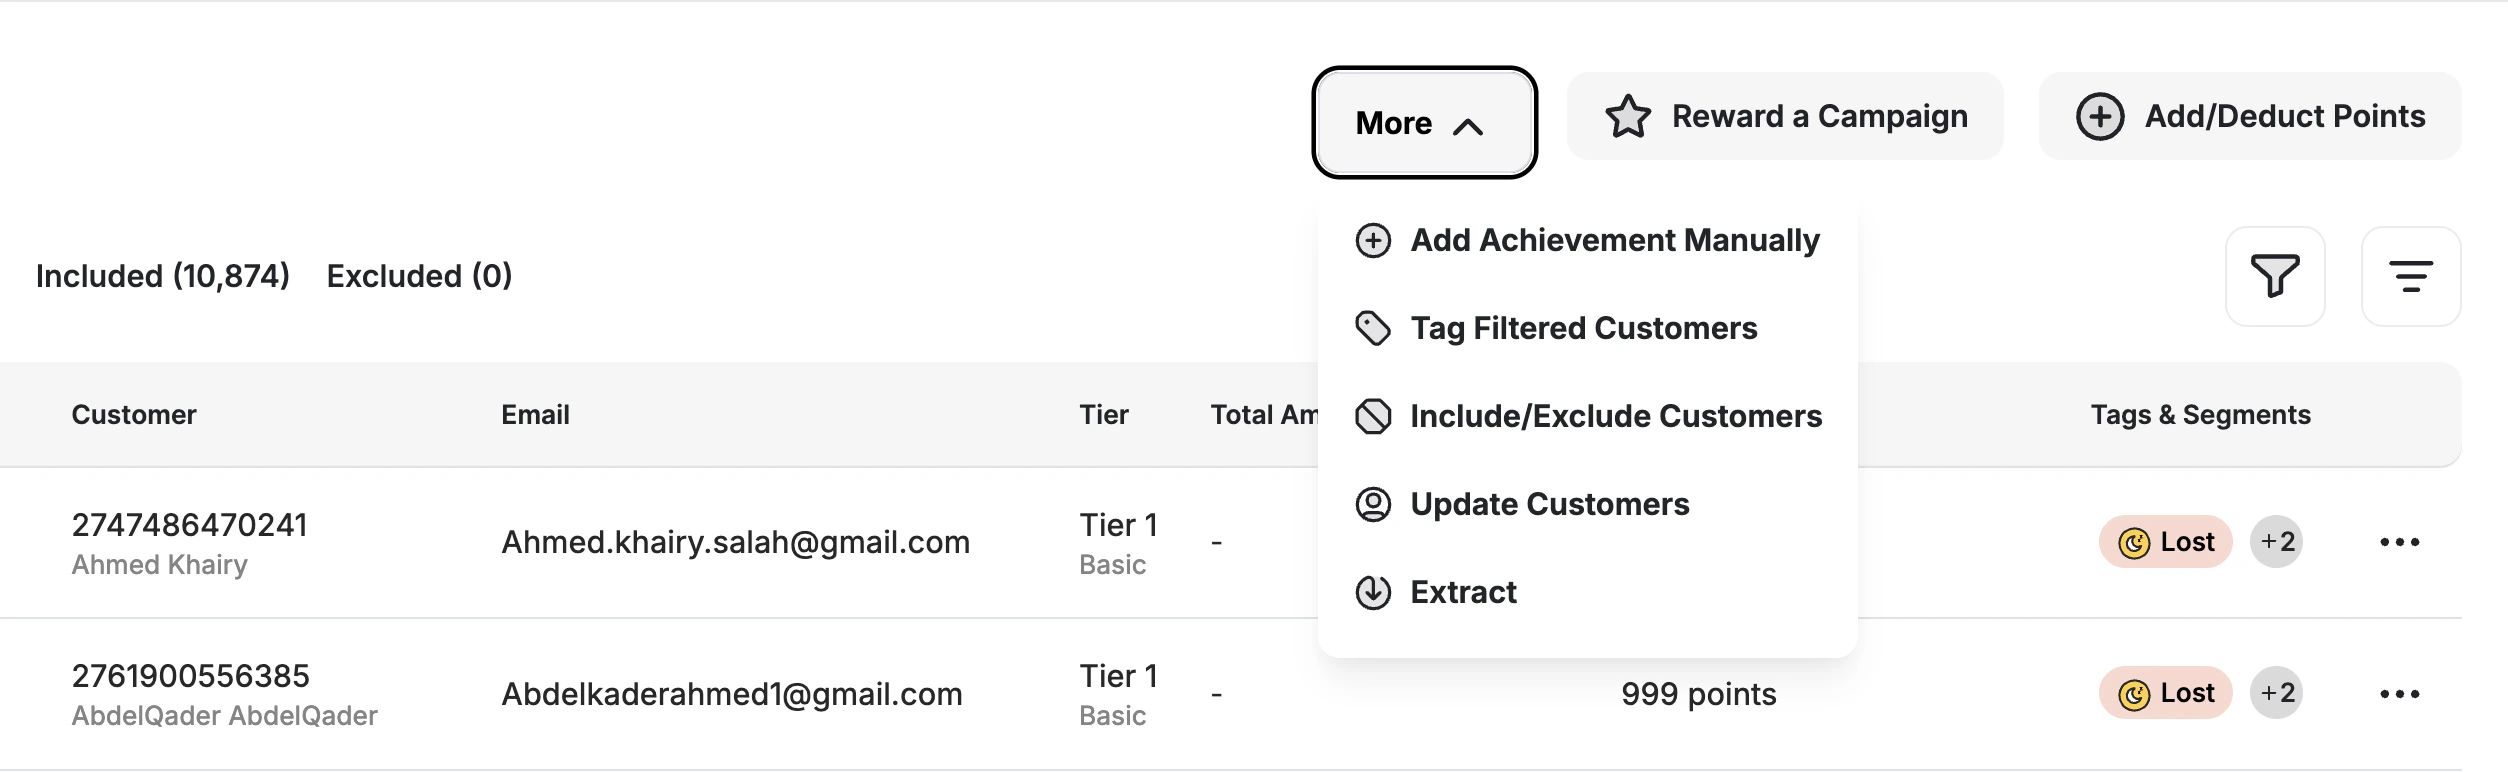
Available Bulk Actions
- You cannot delete customers in bulk.
- There are some other bulk actions you can apply using the batch creation API.
Save Views and Choose Your Columns
A saved view stores the filters and sort order of your Customers list under a name, so you can reopen the same group of customers in one click. You can keep a view to yourself or share it with your whole team. Each view also keeps its own columns.Save a View
1
Filter the list, then choose Save View
Apply the filters and sort order you want, then click Save View.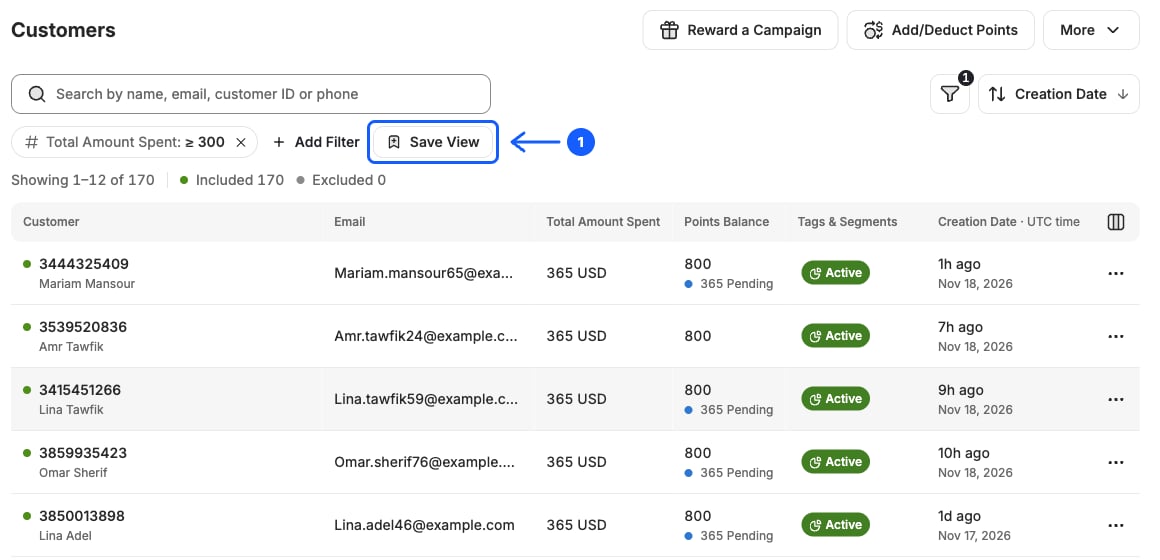
2
Name the view and choose who can see it
Enter a name for the view and choose whether to keep it to yourself or share it with everyone on your team.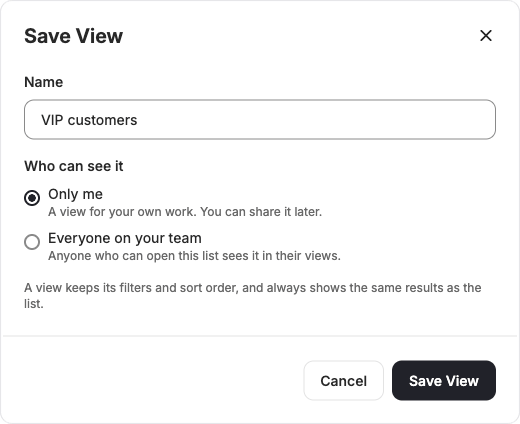
3
Open any of your views in one click
Select a view to see the customers who match it right now. You can set a default view that opens with the list.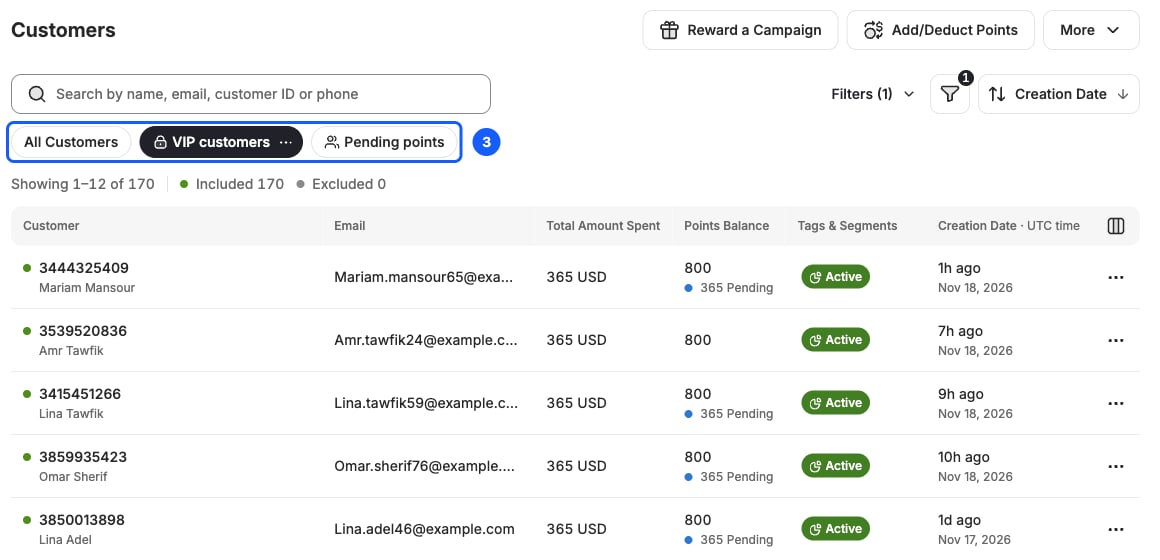
4
Search inside the open view
Search the customers in the open view by name, email, customer ID, or phone number.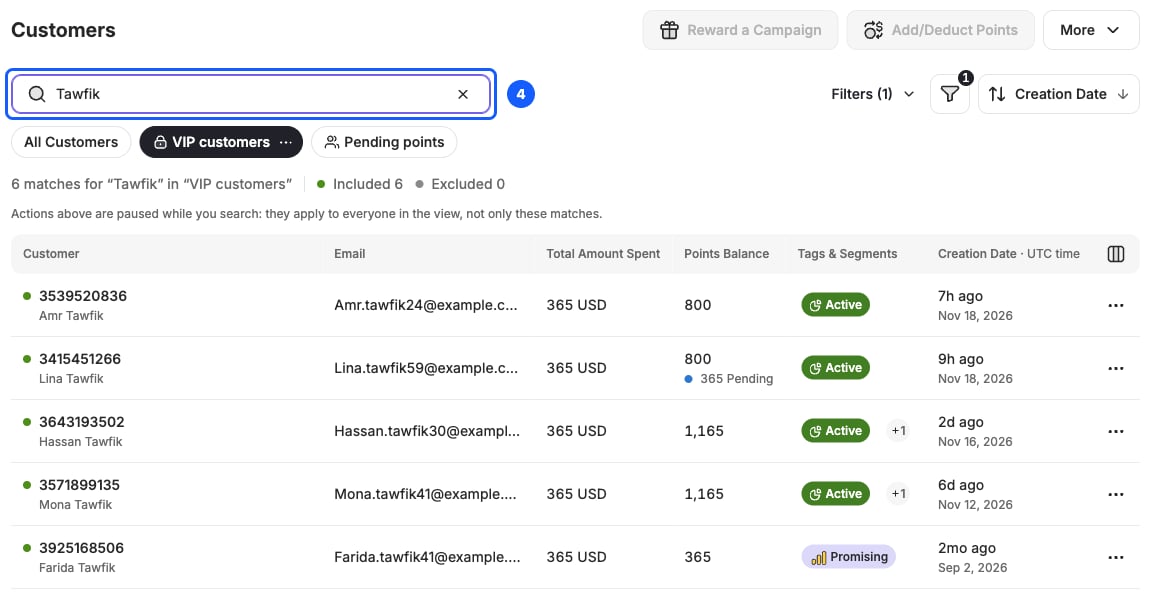
You can save up to 50 views each.
Choose Your Columns
Choose which columns the list shows, and in what order, right in the table header. Each saved view keeps its own columns.1
Edit the columns in the table header
Drag a column to reorder it, or hide a column you do not need.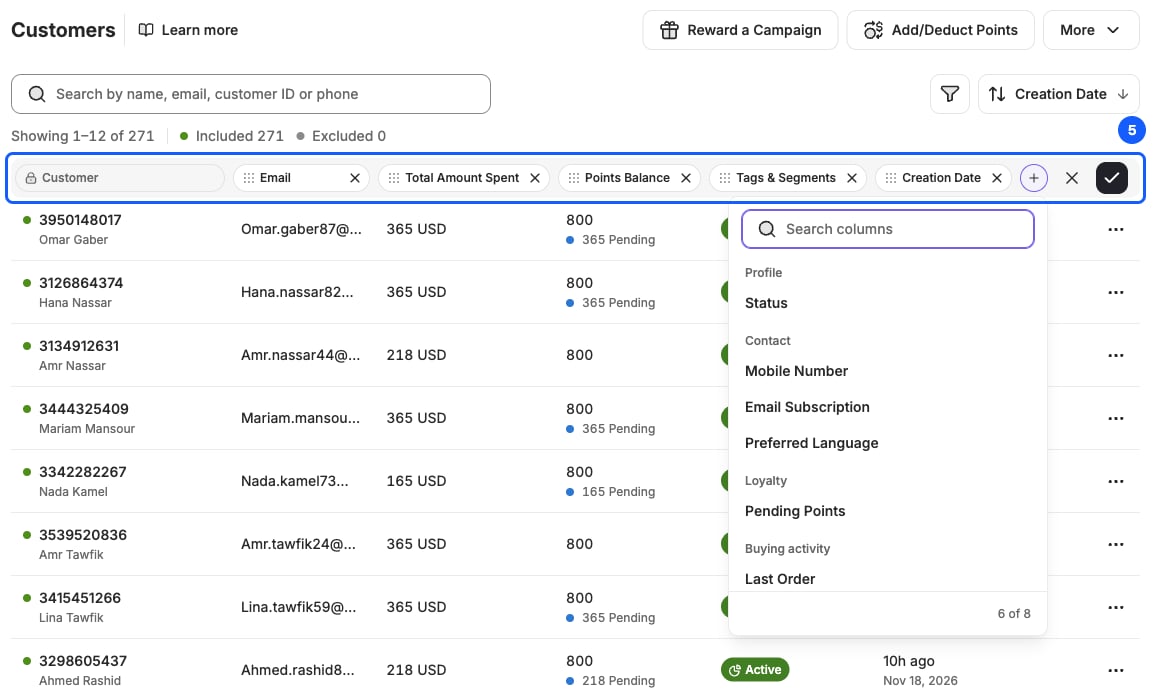
2
Add the columns you need
Add extra columns such as status, last order, total spent, redemptions, referral code, and country.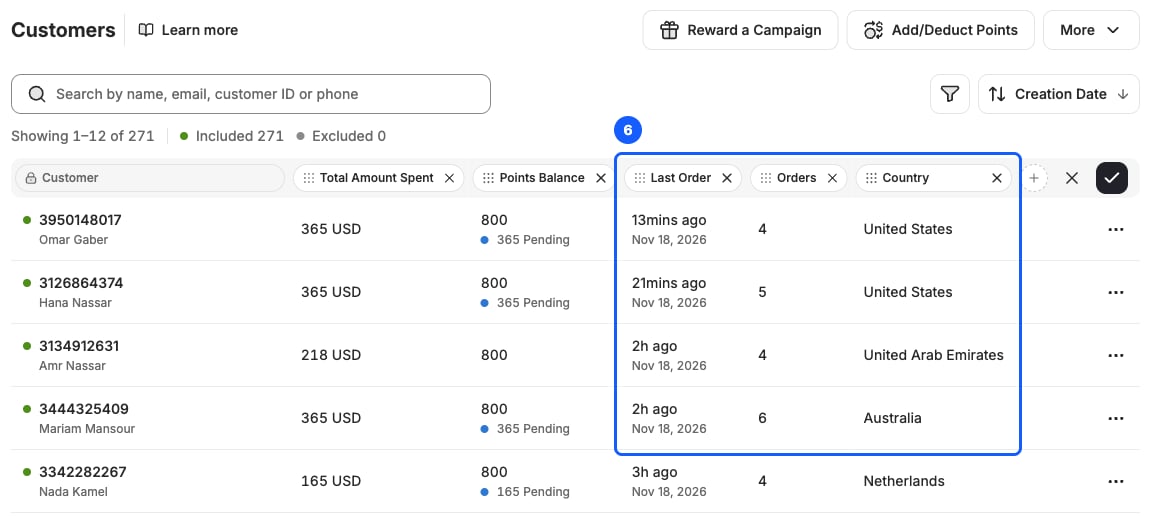
Related Articles
Export Your Customer List
Export your customer data to a CSV file with detailed fields.
Customer Activity Log
Track all customer transactions and activities.
Group Customers by Tags
Use tags to manually group and target customers.
Explore a Customer Profile
View and manage individual customer data.